
Effortless Transition: How to Convert Network Settings From Public to Private in Windows 11
Effortless Installation Guide: Get the Latest Windows 10 Version Now
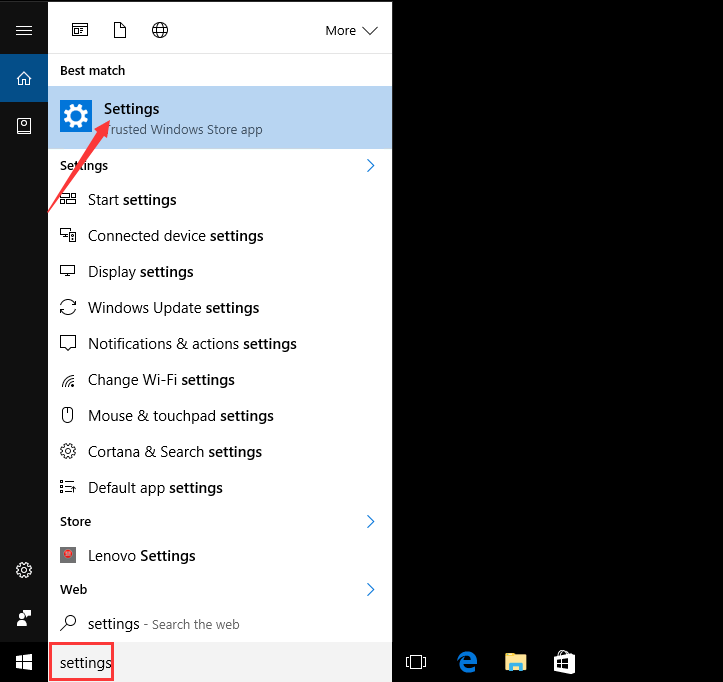
Windows 10 Anniversary Update was rolled out on August 2nd. This is a big update since the launch of Windows 10, which makes Windows 10 more stable by bringing some improvements and new features. If you set Windows Update installed automatically, then the anniversary update will be downloaded and installed automatically when it is available for your device. If not, you can download and install the update manually. You can also check for and install the update manually when the automatic update is not available for your device yet. Read on and learn how to download and install the update manually.Download and Install the Update through Windows Update ManuallyFollowing these steps: 1. Typesettingsin the search box at the bottom left corner of the desktop, then a menu with the search results will pop up. ClickSettingsin the menu.
2. ClickUpdate & security.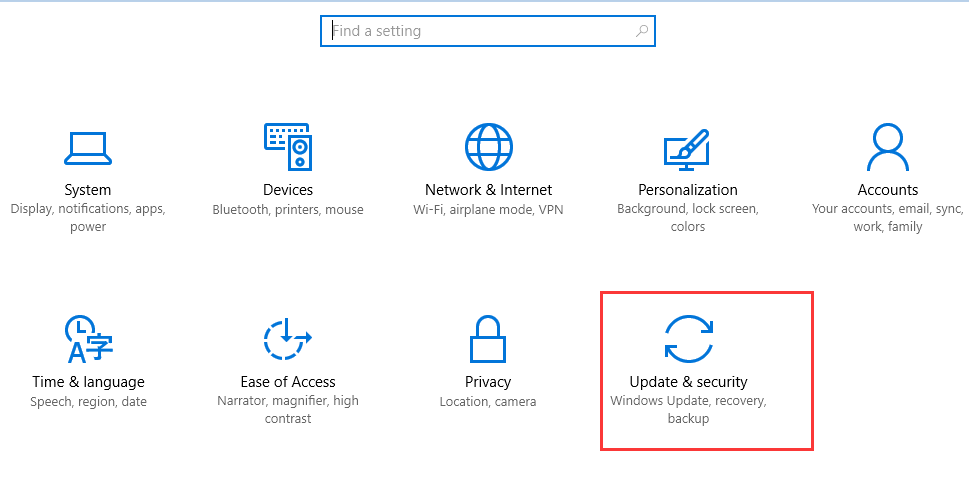 3. ClickCheck for updates.
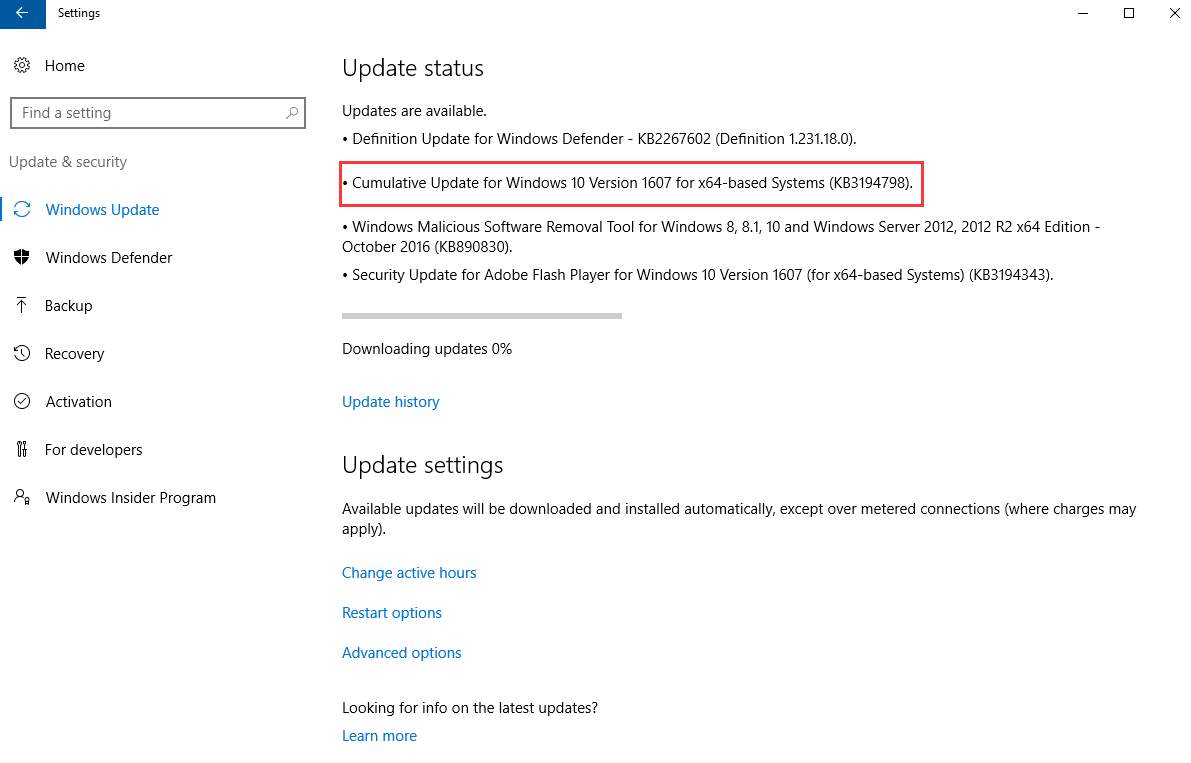
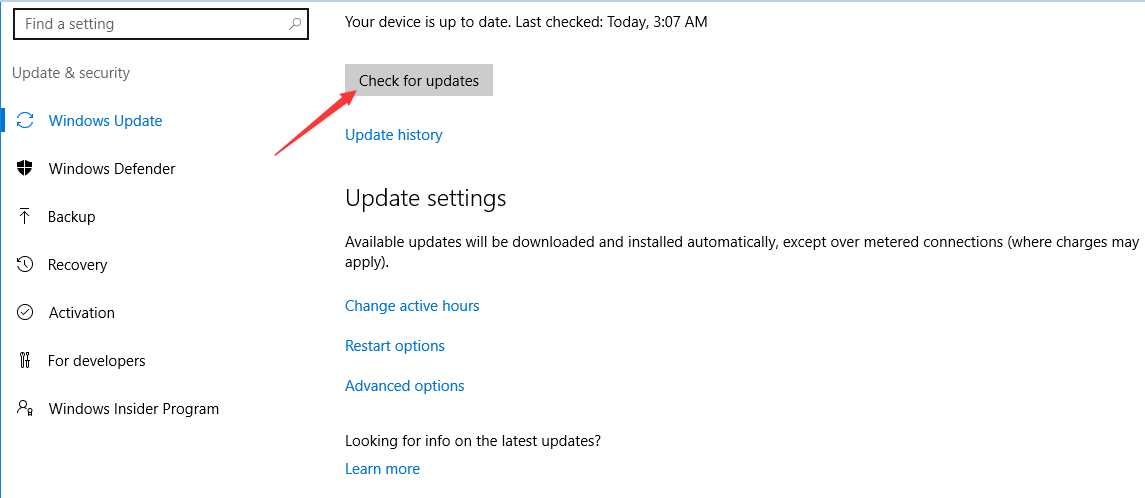 Then the download for all updates will start. As you can see, the Anniversary Update version is 1607.
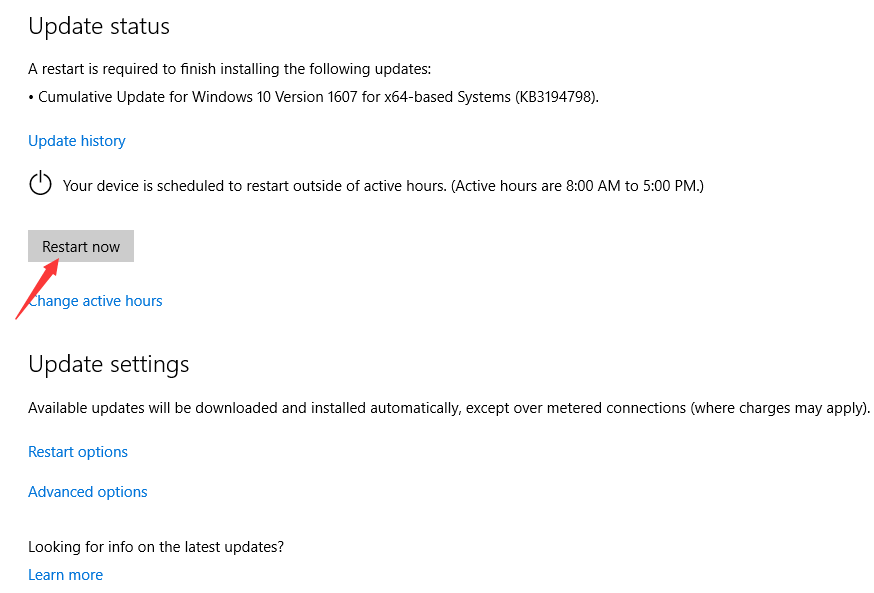
4. After update is completed, clickRestart Nowto restart your PC.
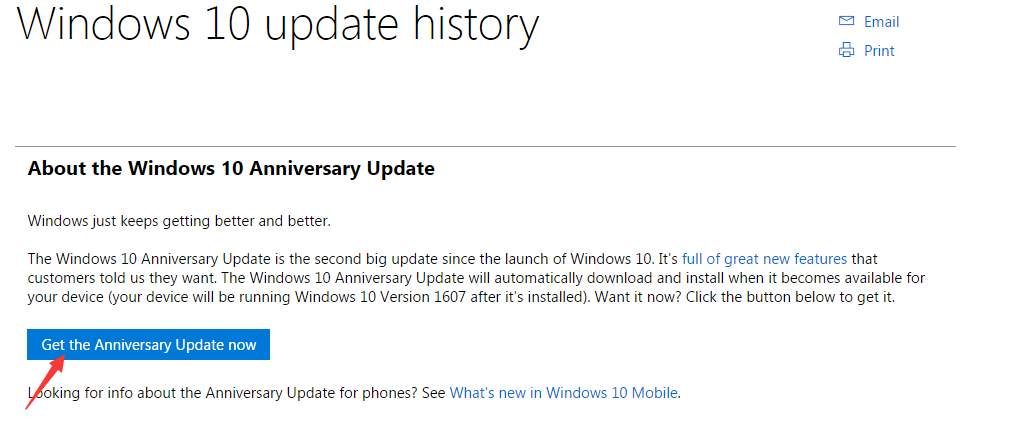
**Note:**To get Anniversary Update through Windows Update, you need to have Windows 10 for at least 30 days. If you just upgraded to Windows 10 and have it less than 30 days, but want to get Anniversary Update right now, you can download it from Microsoft official website.Download Windows 10 Anniversary Update from MicrosoftMicrosoft has released Windows 10 Anniversary Update on their website. Follow steps below to download the update from them. 1. Clickhere to go to the download page. 2. Click on Get the Anniversary Update nowthen the download will start.
The downloaded file is an executable file (.exe). Just double-click on it and follow the on-screen instructions to install the update. After install completes, you will be asked to restart your PC. Restart it for the changes to take effect.
Also read:
- [Updated] Channel Expansion Techniques for 30+ Online Platforms
- [Updated] In 2024, Enhancing Accessibility with Vimeo Subtitles
- [Updated] Quick Video Value Calculation Tools
- 9 Solutions to Fix Process System Isnt Responding Error on Vivo Y27 5G | Dr.fone
- Best Way to Experience Middle Earth - Sequencing 'The Lord of the Rings'
- Für Windows 11/10/8/7 Verfügbare Kostenlose Synchronisationsoptionen Als Ersatz Für ChronoSync
- How to Handle Error Messages When msstdfmt.dll Is Unavailable
- In 2024, Unlocking Apple iPhone 12 mini Lock Screen 3 Foolproof Methods that Actually Work
- Selecting the Perfect Surge Protector: A Guide for Your Gadgets
- Solving the 'Python24.dll' Error: A Comprehensive Guide
- Solving wlanapi.dll Error: A Comprehensive Guide
- Step-by-Step Guide: Resetting a Forgotten iPad Unlock Code
- Troubleshooting MSVCRT10.DLL File Not Found Errors in Windows
- Unmatched Melodies Selector, Android Companion
- Unveiling Top Reasons Behind Graphics Card Failures: Insights From YL Computing and Tech Experts
- Title: Effortless Transition: How to Convert Network Settings From Public to Private in Windows 11
- Author: Stephen
- Created at : 2025-01-29 17:47:59
- Updated at : 2025-01-30 17:09:36
- Link: https://tech-recovery.techidaily.com/effortless-transition-how-to-convert-network-settings-from-public-to-private-in-windows-11/
- License: This work is licensed under CC BY-NC-SA 4.0.