
Step-by-Step Guide: Switching Your Keyboard Layout in Windows 11

Step-by-Step Guide: Switching Your Keyboard Layout in Windows 11
Quick Links
- How to Change Your Keyboard Language
- How to Change Your Keyboard Layout
- How to Remove a Keyboard Language or Layout
Key Takeaways
- To change your keyboard language, navigate to Settings > Time & Language > Language & Region > Add a Language, then install and select a language.
- You can also change the keyboard layout for your language by selecting “Language Options” in “Language & Region” and selecting “Add a Keyboard.”
- To remove a language or keyboard layout, open to the “Language Options” page, click the three-dot menu icon next to the language and select “Remove.”
Whether you work with international clients or just want to impress your friends, you might encounter situations that require you to type in another language. Fortunately, navigating between keyboard layouts and typing in your desired language is a breeze on Windows 11.
How to Change Your Keyboard Language
During the Windows 11 setup process, you’ll be asked to choose your preferred keyboard language. This will become the default language for your computer. However, you can easily install additional keyboard languages and switch between them through the Windows Settings app.
To add a keyboard language, press Windows+i to open the Settings app (there are other ways to launch the Settings app on Windows ).
Select “Time & Language” from the left sidebar, and then click “Language & Region” in the right pane.
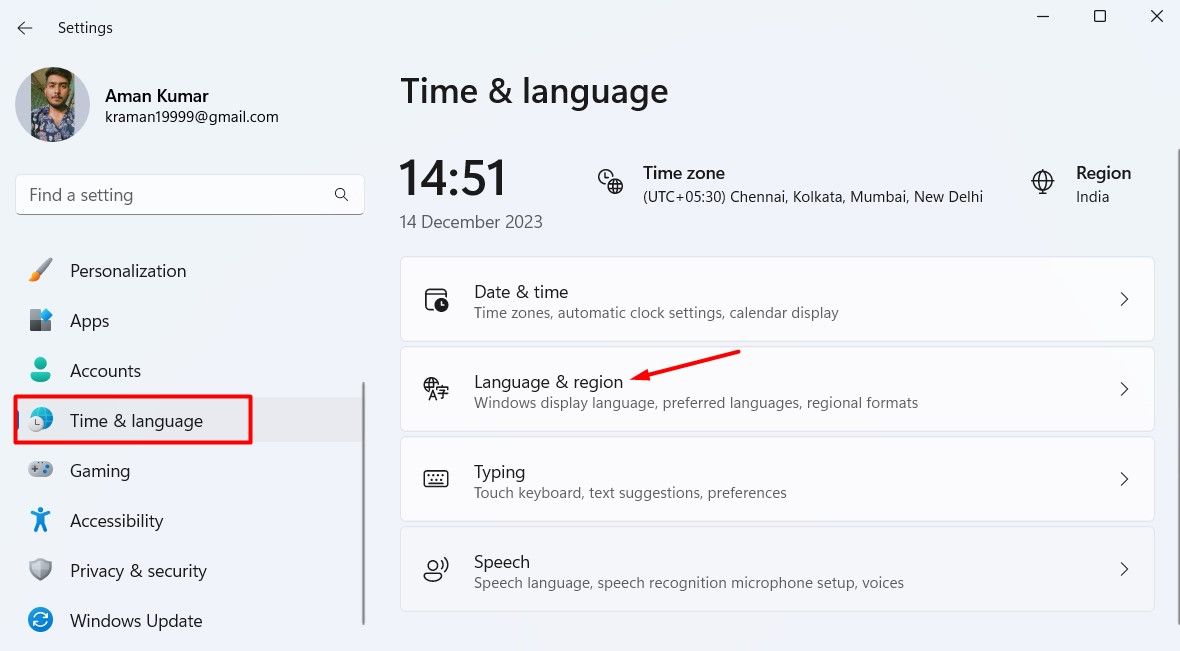
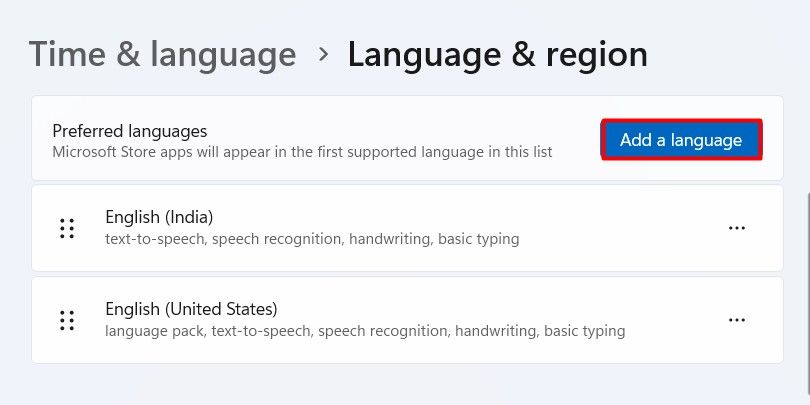
Click the “Add a Language” button.
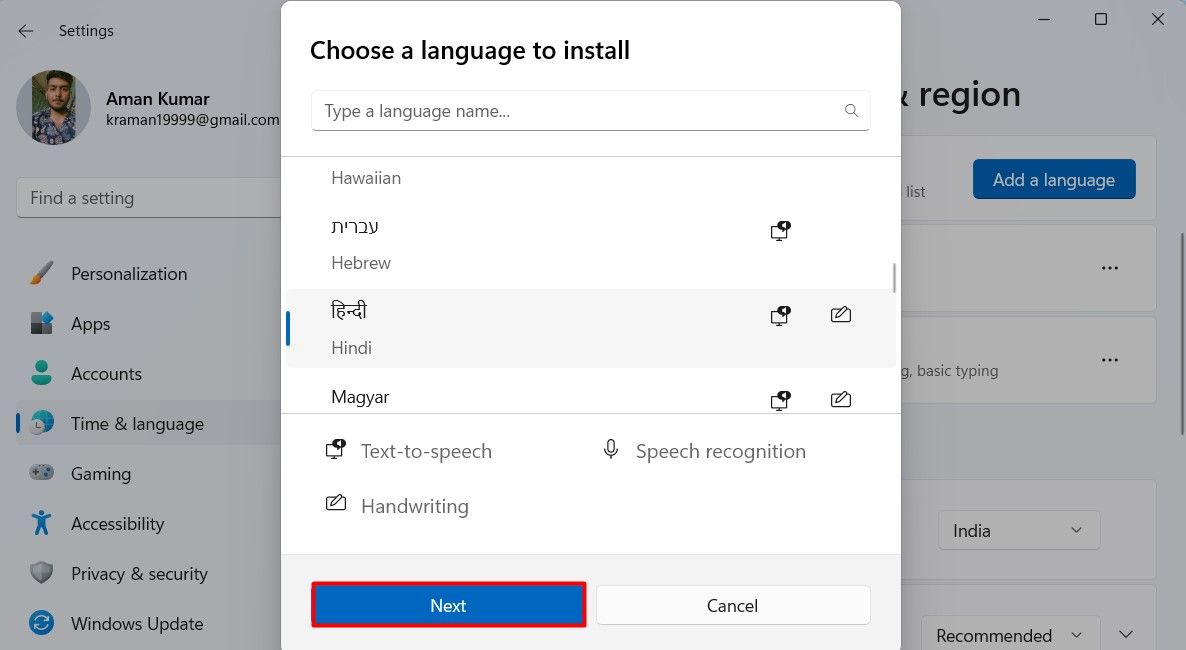
Choose the language you want to install and then click the “Next” button.
Click “Install” to begin the installation process.

Once your language is installed, you’ll see it listed under the Languages section. You can then click the language icon on the taskbar and choose the language you want to use.
![]()
Alternatively, you can press the Windows+ Spacebar or Alt+Shift keys together to switch the language on your Windows computer.
How to Change Your Keyboard Layout
Different languages have different keyboard layouts that are automatically installed when you install the language. However, the default layout for your language might not always be the best option for you.
In this case, you can choose from different layouts available for your language and install the one that best fits your typing habits. To install a different layout for your language, open the “Settings” app and navigate to Time & Language > Language & Region.
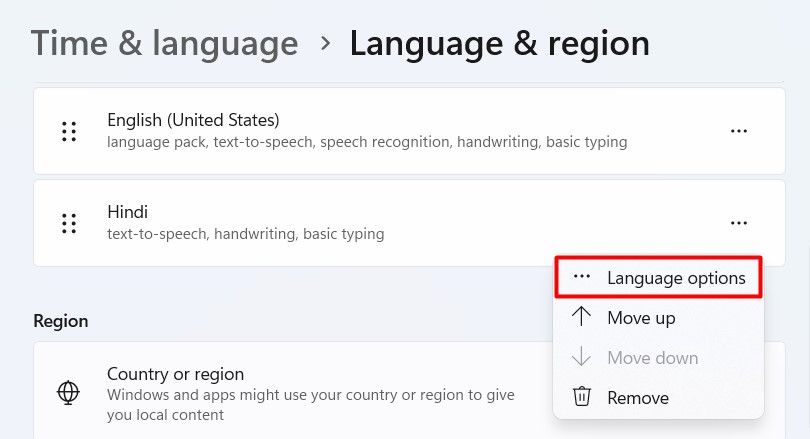
Click the three dots next to your language and select “Language Options” from the menu that appears.
Click the “Add a Keyboard” button next to Installed keyboards.
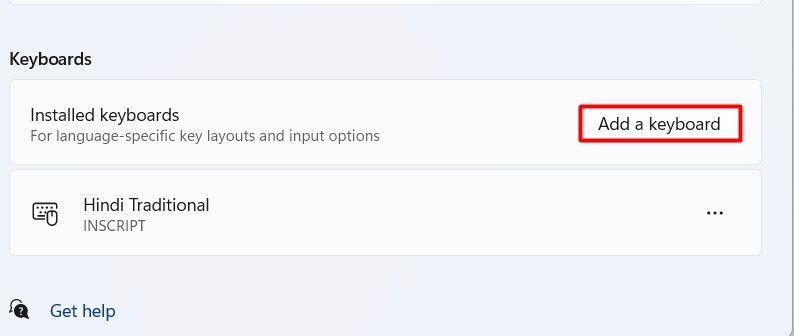
Choose the layout of your choice to install it. You can use the on-screen keyboard to see how the selected layout will work on your computer.
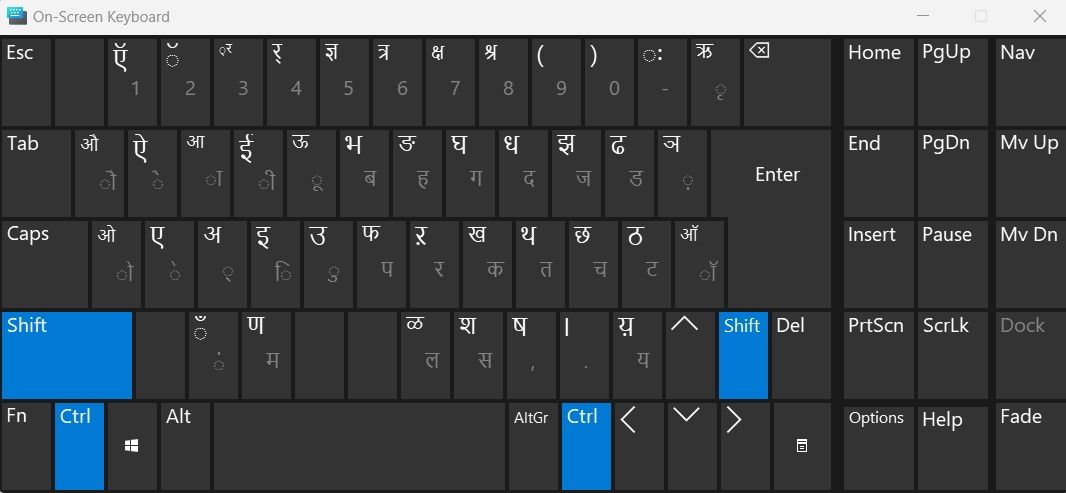
Once you’ve finalized a layout, you can remove the other keyboard layouts for your language.
How to Remove a Keyboard Language or Layout
If you no longer use a language on your computer, you can remove it to avoid accidentally switching to it. To remove a keyboard language, launch the Settings app and head towards Time & Language > Language & Region.
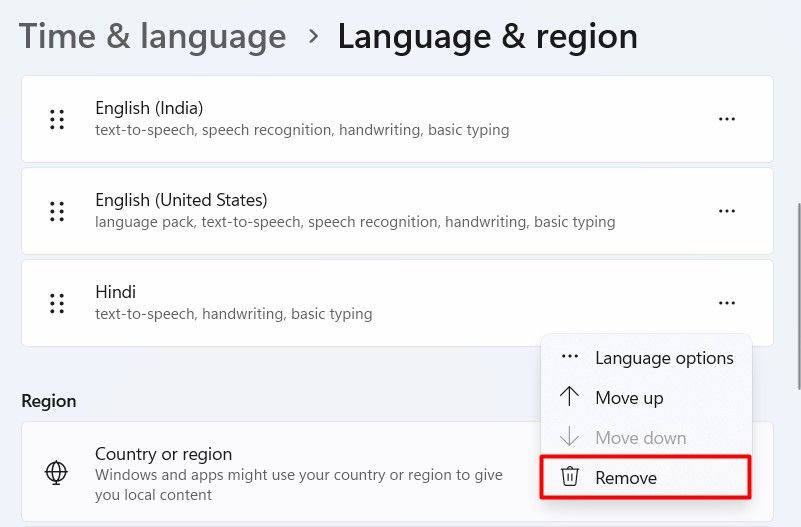
Click the three dots next to the language you want to remove and then choose “Remove” from the menu that appears.
A prompt will appear asking you to confirm whether you want to remove the selected language. Click “Yes” to confirm.
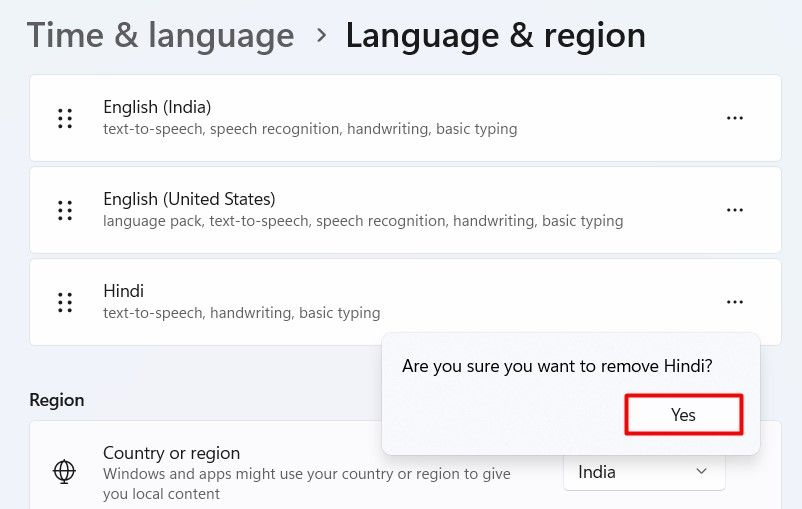
That’s all! The selected language is now removed from your computer.
As we mentioned before, a language can have multiple keyboard layouts. If you don’t like a particular layout for your language, you can remove it. To do this, click the three dots next to the language whose layout you want to remove and choose “Language Options” from the menu.

Under the Keyboards section, click the three dots next to the layout you want to remove and choose “Remove” from the menu that crops up.
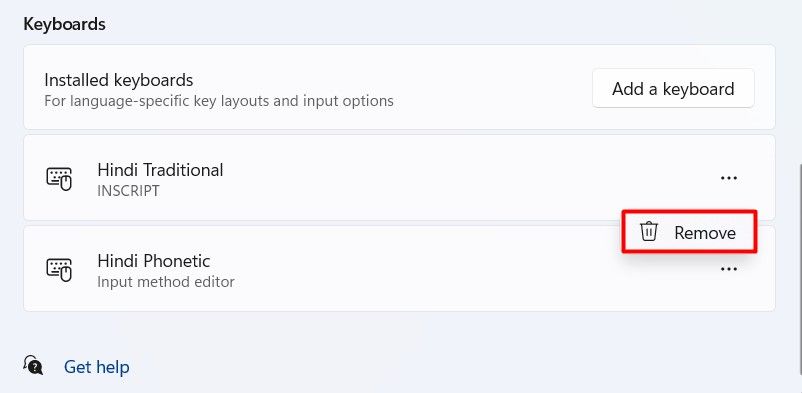
If you want to delete multiple keyboard layouts, just repeat the above process for each layout you wish to remove.
This was everything you needed to know about changing your keyboard language and layout on Windows 11. If you’re new to Windows, you might be interested in learning some basics, like how to disable the touchpad or how to disable keyboard sound .
Also read:
- [New] In 2024, Non-GTA Narratives Urban Games of Similar Flair
- [New] Next Evaluation Diverse Solutions
- [Updated] Exceptional Windows Calls 8 Highest Rated
- [Updated] Maximizing Video Quality with GoPro Max or Hero 11, In 2024
- [Updated] Vocal Innovation at Your Fingertips with PUBG Hacks for 2024
- 2024 Approved How to Edit Photos on Snapchat
- Best All-in-One Cable Modem/Router Systems of 2024 Reviewed
- Capturing the Perfect Shot with iPhone Camera Timers Explained
- Chromecast Firmware Upgrade - How and Why?
- Create Personalized Email Alert Tones with Gmail: A Step-by-Step Guide
- Discover the Best iMessage Gaming Trends : The Top 7 Picks
- Installing Device Drivers Manually in Windows Without an Internet Connection
- Leading 8 Chrome Addons with AI for Increased Productivity
- Master Resetting AirPods: Overcoming Connection and Configuration Hurdles
- Overcoming Common Difficulties: Repairing DVD/BD/CD Drives That Refuse to Release Discs
- Professional Video Grabber for Win10 PCs for 2024
- Seamless Integration of WhatsApp on Your Mac - A Comprehensive Guide
- Simple Troubleshooting Steps for a Non-Functioning Hangouts Microphone
- Streamline Schoolwork with Our Picked Collection of Homework Helper Apps for the Whole Family
- Title: Step-by-Step Guide: Switching Your Keyboard Layout in Windows 11
- Author: Stephen
- Created at : 2024-12-04 10:14:42
- Updated at : 2024-12-10 17:36:50
- Link: https://tech-recovery.techidaily.com/step-by-step-guide-switching-your-keyboard-layout-in-windows-11/
- License: This work is licensed under CC BY-NC-SA 4.0.